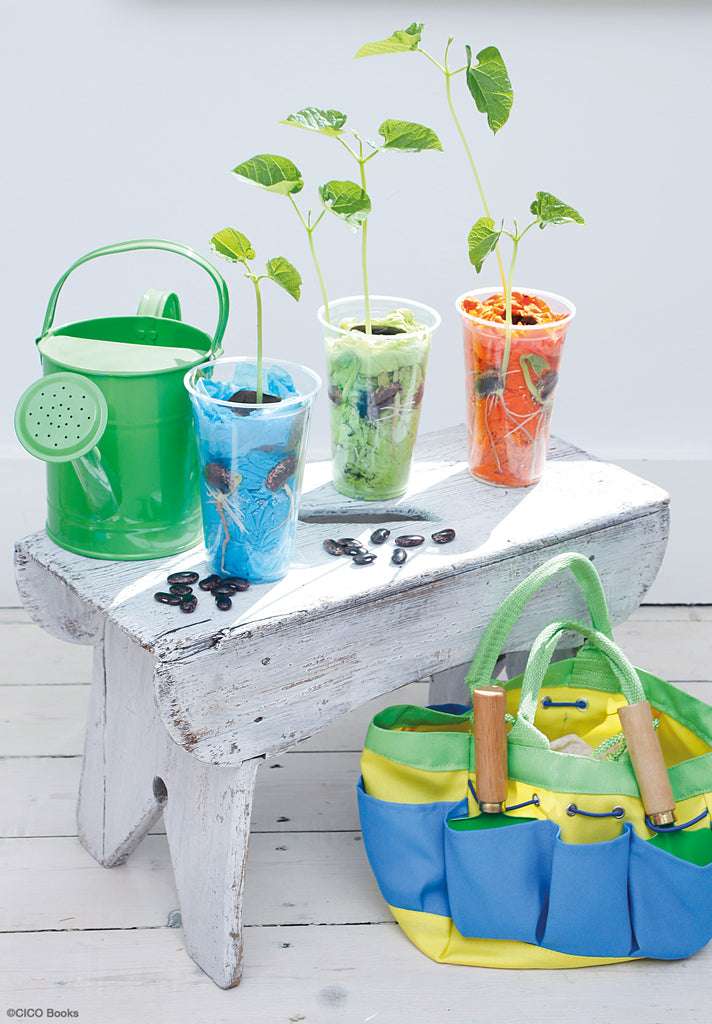
Have you ever wondered what happens to seeds after you’ve planted them in the ground? Now you can find out with these stop-motion bean pots. They will show you the stages of germination and you will be rewarded with a bean plant ready to put in the garden.
You will need
Cardboard tube
Newspaper
Sticky tape
Potting mix (compost)
Clear plastic pint-sized beaker
Coloured paper napkins
Pole/Runner or green (climbing French) bean seeds (Instead of runner beans you could grow other types of beans—French beans, fava (broad) beans, or borlotti beans. Only climbing beans will need a cane for support)
Small pitcher (jug)
Hand trowel
Bamboo cane
Watering can
- Place the cardboard tube end down on a double layer of newspaper. Now gather up the newspaper around the tube and secure it with sticky tape. It doesn’t have to be neat but one end of the tube must be sealed.

- Carefully fill the tube with some potting mix (compost), making sure that you firm it down inside the tube as you go (but don’t push it through the paper end!). Place the tube in the plastic beaker and stuff paper napkins in the space between the tube and the sides of the beaker.

- Use your finger to make a hole about 1½ in. (4 cm) deep in the potting mix. Plant a bean seed in the hole, cover it over with more potting mix, and then firm it down. Try not to spill any over the side of the tube.


- Push another bean seed about 1½ in. (4 cm) down the side of the beaker between the beaker and the napkin so that you can see it clearly from the outside.

- With a small pitcher (jug), slowly add water to the tube and beaker so that the potting mix and napkins are both damp.

- After two days, push another bean down the side of the beaker but a little farther along. Keep doing this every two days until you have 6–8 seeds around your pot. Keep the potting mix and napkins damp. Watch the beans begin to germinate one by one and then, as you turn the beaker around, you will be able to see the whole germination process unfold from start to finish.

- When the central bean has grown two large leaves and you are certain that there will be no more frosts, take the whole cardboard tube carefully out of the beaker. Find a warm sunny spot in your yard, dig a hole that is as deep as the tube, and place the tube into it. Fill the hole with soil around the tube and firm it down with your hands. The tube will rot away as the bean grows. Water it well.

- Push a garden cane into the soil beside the bean plant—the plant will twine itself around the cane as it grows, but you might want to help it to start climbing by tying it to the cane. Remember, beans are thirsty plants so keep it well watered.

INSIDE THE SCIENCE
Seeds come in all different shapes and sizes but inside every seed is a tiny plant (called an embryo) and a store of food. The hard outside, called the seed case, protects the embryo and stops it drying out. The seed stays dormant (which means it doesn’t grow) until it has the right amount of water, air, and warmth. Then the seed case splits and the embryo uses the food store to begin growing. A root grows first, then a shoot, and then the first leaves appear. As soon as the plant has green leaves it can begin to make its own food by photosynthesis…
For more experiments to inspire and challenge budding young scientists, check out My Big Book of Science by Susan Akass. To get more great blog posts like this one - direct to your inbox – be sure to sign up to our mailing list here.